Have you ever spent hours decorating a cake, only to have your fondant crack, bubble, or turn sticky? We’ve all been there! Fondant is a game-changer when it comes to achieving a smooth, professional cake finish, but it can be tricky to master. The good news? Avoiding common fondant mistakes is easier than you think!
Whether you’re making a wedding cake or a fun birthday creation, understanding how to prevent air bubbles, cracking, and drying will save you time—and frustration. In this guide, we’ll walk through the biggest fondant cake mistakes and, more importantly, how to fix them. With the right techniques and a few expert tips, you’ll soon be creating flawless, bakery-worthy cakes right in your own kitchen! Ready to level up your cake decorating skills? Let’s get started!
Table of Contents
Key Benefits of Using Fondant Correctly
Fondant can transform any cake into a smooth, elegant masterpiece, but getting it right requires some know-how. If you’ve ever struggled with cracks, air bubbles, or sticky fondant, don’t worry—you’re not alone! Mastering fondant is all about technique, patience, and the right preparation. Here’s why understanding fondant mistakes and how to avoid them will elevate your cake decorating skills:
1. Achieve a Professional, Flawless Finish
- Fondant creates a polished, smooth surface that buttercream alone can’t match.
- Perfect for wedding cakes, birthday cakes, and intricate designs.
2. Prevent Cracking and Drying
- Improper kneading or rolling can lead to cracks—knowing how to handle fondant keeps it pliable and easy to work with.
- A well-hydrated fondant means fewer imperfections and seamless application.
3. Avoid Air Bubbles and Wrinkles
- Trapped air can ruin an otherwise perfect cake. Using a fondant smoother and proper rolling techniques helps eliminate these issues.
- Learning how to apply fondant properly ensures a wrinkle-free, professional appearance.
4. Enhance Cake Moisture and Freshness
- Fondant acts as a protective seal, keeping cakes moist and fresh for longer periods.
- Ideal for special events where cakes need to hold their shape and texture.
5. Experiment with Creative Designs
- Mastering fondant opens up a world of decorating possibilities, from sculpted figures to embossed patterns.
- You can also add flavors and colors to customize your cake creations.
By understanding these key benefits, you’re already on the path to creating flawless fondant cakes. The best part? With a few expert tricks and the right techniques, you can avoid common mistakes and turn every cake into a masterpiece. Ready to dive in? Let’s get started
Ingredients for a Perfect Fondant Cake

Before you start rolling out fondant, gathering the right ingredients is key to achieving a flawless finish. Using high-quality ingredients ensures that your fondant is smooth, pliable, and easy to work with. Here’s everything you’ll need:
For the Cake Base
A sturdy cake is essential for supporting fondant. Opt for a dense cake that holds its shape well. Some great choices include:
- Vanilla sponge cake – A classic, firm base that pairs well with fondant.
- Chocolate cake – Rich and stable, providing a great foundation.
- Butter cake – Dense enough to support fondant without crumbling.
- Carrot or red velvet cake – If using these, apply a firm crumb coat for extra stability.
For the Buttercream Crumb Coat
Before applying fondant, a smooth crumb coat helps it adhere properly and prevents bulging. You’ll need:
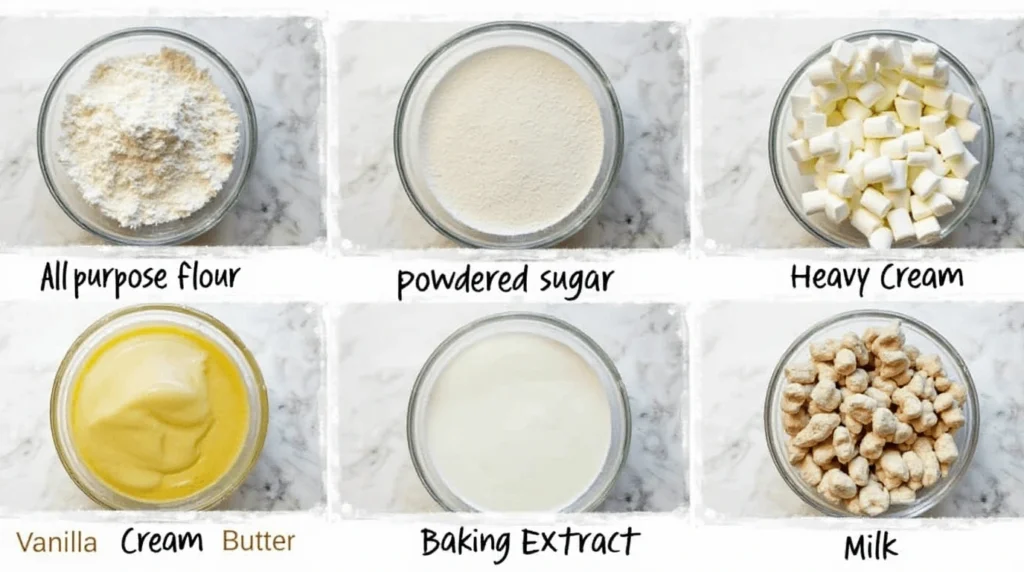
- 1 cup unsalted butter (room temperature)
- 3 cups powdered sugar (sifted)
- 2-3 tablespoons heavy cream (adjust for desired consistency)
- 1 teaspoon vanilla extract (or your preferred flavoring)
Tip: A thin, even layer of buttercream provides a tacky surface for the fondant to stick to, preventing air pockets.
For the Fondant
If making homemade fondant, these ingredients will help achieve the perfect texture:
- 16 oz mini marshmallows – Melted to form the base.
- 4 cups powdered sugar – Adds structure and sweetness.
- 2 tablespoons water – Helps melt the marshmallows smoothly.
- 1 teaspoon vanilla extract – Enhances flavor.
- Vegetable shortening – Prevents drying and cracking while kneading.
- Cornstarch or powdered sugar – For dusting while rolling out fondant.
Optional Additions:
- Tylose powder – Strengthens fondant for sculpting decorations.
- Gel food coloring – For customizing colors without altering fondant texture.
- Edible shimmer dust – Adds a professional finishing touch.
Why These Ingredients Matter
Each ingredient plays a crucial role in preventing common fondant cake mistakes like cracking, tearing, and sweating. Using high-quality butter, sifted sugar, and a well-kneaded fondant makes a world of difference.
With all your ingredients ready, you’re now set for the fun part—assembling and decorating your fondant cake like a pro!
Step-by-Step Instructions for a Flawless Fondant Cake

Now that you have all your ingredients ready, it’s time to bring your fondant cake to life! Follow these detailed, step-by-step instructions to ensure a smooth, professional-looking finish without any common fondant mishaps.
Step 1: Prepare and Level the Cake
A solid foundation is key to preventing fondant cracks or bulging. Here’s how to prep your cake:
- Cool the cake completely before handling—warm cakes can cause the fondant to melt or slip.
- Trim and level the top of each layer using a serrated knife or cake leveler to create an even surface.
- Apply simple syrup (optional) to keep the cake moist without making it soggy.
Tip: A dense cake (like butter cake or sponge cake) holds its shape better under fondant than a light, airy cake.
Step 2: Apply the Crumb Coat
A smooth buttercream base prevents fondant from slipping and helps it adhere properly.
- Spread a thin layer of buttercream over the entire cake using an offset spatula.
- Chill the cake for 30 minutes to let the crumb coat firm up—this prevents the fondant from picking up crumbs.
- Apply a second coat if needed to create an even, smooth surface.
Tip: The smoother your buttercream base, the better your fondant will look.
Step 3: Roll Out the Fondant
The right rolling technique makes all the difference in achieving a wrinkle-free fondant finish.
- Dust your work surface lightly with cornstarch or powdered sugar to prevent sticking.
- Knead the fondant until it’s soft and pliable—this prevents cracks and air bubbles.
- Roll out the fondant into a circle about 1/8 inch thick and at least 2 inches wider than your cake’s diameter.
Tip: Use a fondant rolling pin to ensure an even thickness across the surface.
Step 4: Cover the Cake with Fondant
This is the trickiest part, but with the right approach, you’ll get a smooth, seamless finish.
- Carefully lift the rolled-out fondant using a rolling pin or your hands.
- Drape it gently over the cake, ensuring it covers the entire surface.
- Use a fondant smoother to press the top and sides, eliminating any air bubbles.
- Work your way down the sides, gently pulling and smoothing to prevent wrinkles.
- Trim the excess fondant at the base with a sharp knife.
Tip: If air bubbles appear, use a small pin to gently release the air, then smooth over the spot.
Step 5: Add Decorative Touches
Now for the fun part—decorating your masterpiece!
- Use embossing tools or textured mats to create unique patterns.
- Apply gel food coloring for custom designs.
- Dust with edible shimmer powder for a polished, professional look.
- Create fondant cutouts or figures to personalize the cake.
Step 6: Store and Serve
To keep your cake fresh and looking perfect:
- Store at room temperature in a cool, dry place. Refrigeration can cause condensation, making the fondant sticky.
- Use a cake box when transporting to protect the fondant finish.
- Slice with a sharp knife, wiping between cuts for clean edges.
By following these steps, you’ll create a stunning, bakery-quality fondant cake that’s as delicious as it is beautiful. Ready to impress your guests? Let’s bake with confidence!
Pro Tips and Variations for a Perfect Fondant Cake
Mastering fondant takes practice, but with a few expert tips and creative variations, you can achieve a flawless finish every time. Whether you’re troubleshooting common issues or looking for unique ways to personalize your cake, these pro tips will elevate your fondant game.
1. Preventing Fondant Cracks and Tears
Cracked fondant can ruin the look of your cake, but it’s easily avoidable with the right technique:
- Knead your fondant thoroughly before rolling it out to ensure elasticity.
- Use vegetable shortening while kneading to keep fondant soft and pliable.
- Avoid rolling too thin—fondant should be at least 1/8 inch thick to prevent tearing.
- Cover unused fondant with plastic wrap to keep it from drying out.
Fix: If cracks appear, smooth them out with a touch of shortening or a bit of warm water on a food-safe brush.
2. Eliminating Air Bubbles
Air bubbles can cause unsightly bumps on your cake. Here’s how to prevent them:
- Roll fondant slowly and evenly to reduce trapped air.
- Use a fondant smoother to press out air pockets while covering the cake.
- If a bubble appears, gently pierce it with a pin, then smooth it out with your fingers.
3. Avoiding Sticky or Sweaty Fondant
Humidity can cause fondant to become sticky, leading to a messy application. Try these fixes:
- Work in a cool, dry environment—air conditioning is your friend!
- Lightly dust with cornstarch or powdered sugar if fondant is too sticky.
- Avoid refrigerating fondant cakes as condensation can ruin the smooth finish.
4. Enhancing Flavor for a Better Fondant Experience
Traditional fondant has a mild sweetness, but you can customize it for a tastier experience:
- Add extracts like vanilla, almond, or citrus for subtle flavor.
- Mix in melted white chocolate for a richer, creamier fondant.
- If you prefer a different texture, try marzipan or modeling chocolate as an alternative.
5. Creative Fondant Cake Variations
Once you’ve mastered the basics, try these fun and creative variations to add personality to your cakes:
- Marble Effect: Twist two or more fondant colors together before rolling out for a stunning marbled look.
- Watercolor Fondant: Brush edible food coloring diluted with vodka for a hand-painted watercolor effect.
- Ombre Fondant: Gradually blend different shades of fondant together for a trendy gradient design.
- Textured Patterns: Use silicone molds or embossing mats to create intricate designs on the fondant surface.
- Hand-Painted Fondant: Use edible gold dust or food-safe markers to add artistic details.
6. Storing Fondant for Future Use
If you have leftover fondant, store it properly to keep it fresh for your next cake project:
- Wrap tightly in plastic wrap and place in an airtight container.
- Keep at room temperature—do not refrigerate, as this can alter the texture.
- If fondant hardens, microwave for a few seconds and knead it back to a workable consistency.
Final Thought
With these expert tips and variations, you’ll not only avoid common fondant mistakes but also add creativity and personality to your cakes. Experiment, have fun, and let your artistic side shine—every cake you make is a chance to learn and improve!
Serving Suggestions for a Stunning Fondant Cake
Once your beautifully decorated fondant cake is ready, the next step is presenting and serving it in a way that enhances both its visual appeal and taste. Whether you’re showcasing it at a wedding, birthday party, or special event, here’s how to make the most of your fondant masterpiece.
1. Best Ways to Slice a Fondant Cake
Cutting a fondant-covered cake requires a bit of technique to ensure clean, smooth slices. Follow these tips:
- Use a sharp knife with a long blade—serrated knives can cause fondant to tear.
- Warm the knife slightly by dipping it in hot water, then wipe it dry before slicing.
- Apply gentle pressure to avoid squishing the layers underneath.
- Clean the knife between cuts to maintain neat, defined slices.
Tip: For tiered cakes, remove decorative toppers and support dowels before slicing.
2. Pairing Your Cake with the Right Beverages
Fondant cakes are rich and sweet, so pairing them with the right drink enhances the experience. Consider these options:
- Coffee or Espresso – The slight bitterness balances the cake’s sweetness.
- Milk or Hot Chocolate – A comforting choice, especially for kids.
- Flavored Teas – Earl Grey, chai, or fruit-infused teas complement the cake’s flavors.
- Fresh Lemonade – A refreshing contrast to a decadent fondant cake.
3. Serving Size Recommendations
The size of each slice depends on the occasion and number of guests. Here’s a quick guide:
- For small gatherings – 1.5-inch slices work well for individual servings.
- For large parties or weddings – 1×2-inch pieces ensure more portions per cake.
- For dessert tables – Consider mini fondant cakes or cupcakes for easy grab-and-go servings.
4. How to Store Leftover Fondant Cake
If you have leftover cake, proper storage will keep it fresh and delicious:
- At room temperature: Store in an airtight container for up to 2 days.
- In the refrigerator: Wrap slices in plastic wrap, then place them in a sealed container. Let the cake come to room temperature before serving to prevent fondant sweating.
- In the freezer: If freezing, wrap slices securely with both plastic wrap and aluminum foil. Thaw overnight in the fridge before serving.
5. Decorating for Special Occasions
Customize your fondant cake for any event with these creative touches:
- Birthday Cakes: Add edible glitter, personalized fondant lettering, or hand-painted designs.
- Wedding Cakes: Use pearl dust, sugar flowers, or elegant lace fondant detailing.
- Holiday Cakes: Incorporate festive colors, snowflakes, or themed fondant toppers.
Final Thought
A fondant cake isn’t just about looks—it’s about creating a memorable dessert experience for your guests. By slicing it correctly, pairing it with the right drinks, and storing it properly, you’ll ensure every bite is as delightful as the first. Enjoy your masterpiece and share the joy with every slice!
Conclusion: Mastering Fondant for Flawless Cakes
Creating a fondant cake may seem intimidating at first, but with the right techniques and a little patience, you can achieve a stunning, professional finish every time. By avoiding common fondant mistakes—such as cracking, air bubbles, and stickiness—you’ll gain confidence in your cake decorating skills and be able to craft breathtaking cakes for any occasion.
Key Takeaways for a Perfect Fondant Cake:
✔ Prepare your cake properly – A smooth, crumb-coated base is essential.
✔ Knead and roll fondant correctly – Proper consistency prevents cracks and tearing.
✔ Work efficiently but carefully – Fondant dries quickly, so timing is key.
✔ Fix issues with simple tricks – A touch of shortening can smooth out cracks, and a pin can eliminate air bubbles.
✔ Store and serve your cake properly – Keeping fondant fresh ensures the best results.
Mastering fondant isn’t just about following steps—it’s about experimenting, learning from mistakes, and having fun along the way. The more you practice, the more effortless your decorating skills will become.
So, whether you’re making a wedding cake, birthday cake, or themed celebration dessert, these tips will help you avoid frustrating mishaps and ensure your fondant cake looks as amazing as it tastes.
Now it’s your turn! Try these tips on your next fondant cake and let your creativity shine. Have any fondant questions or experiences to share? Drop them in the comments below—we’d love to hear from you!

Fondant cake
Ingredients
For the Cake Base
- A sturdy cake is essential for supporting fondant. Opt for a dense cake that holds its shape well. Some great choices include:
- Vanilla sponge cake – A classic firm base that pairs well with fondant.
- Chocolate cake – Rich and stable providing a great foundation.
- Butter cake – Dense enough to support fondant without crumbling.
- Carrot or red velvet cake – If using these apply a firm crumb coat for extra stability.
For the Buttercream Crumb Coat
- Before applying fondant a smooth crumb coat helps it adhere properly and prevents bulging. You’ll need:
- 1 cup unsalted butter room temperature
- 3 cups powdered sugar sifted
- 2-3 tablespoons heavy cream adjust for desired consistency
- 1 teaspoon vanilla extract or your preferred flavoring
- Tip: A thin even layer of buttercream provides a tacky surface for the fondant to stick to, preventing air pockets.
For the Fondant
- If making homemade fondant these ingredients will help achieve the perfect texture:
- 16 oz mini marshmallows – Melted to form the base.
- 4 cups powdered sugar – Adds structure and sweetness.
- 2 tablespoons water – Helps melt the marshmallows smoothly.
- 1 teaspoon vanilla extract – Enhances flavor.
- Vegetable shortening – Prevents drying and cracking while kneading.
- Cornstarch or powdered sugar – For dusting while rolling out fondant.
Optional Additions:
- Tylose powder – Strengthens fondant for sculpting decorations.
- Gel food coloring – For customizing colors without altering fondant texture.
- Edible shimmer dust – Adds a professional finishing touch.
Instructions
Step 1: Prepare and Level the Cake
- A solid foundation is key to preventing fondant cracks or bulging. Here’s how to prep your cake:
- Cool the cake completely before handling—warm cakes can cause the fondant to melt or slip.
- Trim and level the top of each layer using a serrated knife or cake leveler to create an even surface.
- Apply simple syrup (optional) to keep the cake moist without making it soggy.
- Tip: A dense cake (like butter cake or sponge cake) holds its shape better under fondant than a light, airy cake.
Step 2: Apply the Crumb Coat
- A smooth buttercream base prevents fondant from slipping and helps it adhere properly.
- Spread a thin layer of buttercream over the entire cake using an offset spatula.
- Chill the cake for 30 minutes to let the crumb coat firm up—this prevents the fondant from picking up crumbs.
- Apply a second coat if needed to create an even, smooth surface.
- Tip: The smoother your buttercream base, the better your fondant will look.
Step 3: Roll Out the Fondant
- The right rolling technique makes all the difference in achieving a wrinkle-free fondant finish.
- Dust your work surface lightly with cornstarch or powdered sugar to prevent sticking.
- Knead the fondant until it’s soft and pliable—this prevents cracks and air bubbles.
- Roll out the fondant into a circle about 1/8 inch thick and at least 2 inches wider than your cake’s diameter.
- Tip: Use a fondant rolling pin to ensure an even thickness across the surface.
Step 4: Cover the Cake with Fondant
- This is the trickiest part, but with the right approach, you’ll get a smooth, seamless finish.
- Carefully lift the rolled-out fondant using a rolling pin or your hands.
- Drape it gently over the cake, ensuring it covers the entire surface.
- Use a fondant smoother to press the top and sides, eliminating any air bubbles.
- Work your way down the sides, gently pulling and smoothing to prevent wrinkles.
- Trim the excess fondant at the base with a sharp knife.
- Tip: If air bubbles appear, use a small pin to gently release the air, then smooth over the spot.
Step 5: Add Decorative Touches
- Now for the fun part—decorating your masterpiece!
- Use embossing tools or textured mats to create unique patterns.
- Apply gel food coloring for custom designs.
- Dust with edible shimmer powder for a polished, professional look.
- Create fondant cutouts or figures to personalize the cake.
Step 6: Store and Serve
- To keep your cake fresh and looking perfect:
- Store at room temperature in a cool, dry place. Refrigeration can cause condensation, making the fondant sticky.
- Use a cake box when transporting to protect the fondant finish.
- Slice with a sharp knife, wiping between cuts for clean edges.
Notes
- Calories: 420 kcal
- Total Fat: 12g
- Saturated Fat: 7g
- Cholesterol: 55mg
- Sodium: 180mg
- Carbohydrates: 72g
- Sugars: 55g
- Protein: 4g
- Fiber: 1g
FAQs: Common Fondant Cake Questions Answered
Fondant can be a game-changer in cake decorating, but it also comes with its fair share of challenges. Here are answers to some of the most frequently asked questions to help you troubleshoot and perfect your fondant cake skills.
1. How do I prevent fondant from cracking?
Cracking usually happens when fondant is too dry or rolled too thin. To avoid this:
Knead in a small amount of vegetable shortening to restore elasticity.
Roll the fondant to at least 1/8 inch thick to prevent weak spots.
Work quickly to avoid drying—fondant dries out when exposed to air for too long.
2. Why does my fondant cake develop air bubbles?
Air bubbles form when fondant traps pockets of air during rolling or application. To fix this:
Use a pin to gently pierce the bubble, then smooth it out with a fondant smoother.
Roll out fondant slowly and evenly to minimize trapped air.
Apply fondant using a downward motion, pressing out any air as you go.
3. How can I keep fondant from sticking while rolling?
Sticky fondant is often due to humidity or overhandling. Try these fixes:
Lightly dust your work surface with cornstarch or powdered sugar to prevent sticking.
Roll fondant on a silicone mat for easy lifting and transferring.
If fondant is too soft, let it rest at room temperature for a few minutes before rolling.
4. Can I refrigerate a fondant-covered cake?
Refrigerating fondant cakes is tricky because condensation can cause stickiness. Instead:
Store the cake in a cool, dry place at room temperature.
If refrigeration is necessary, place the cake in a box before refrigerating to minimize moisture absorption.
Let the cake come to room temperature before serving to prevent sweating.
5. How do I make fondant taste better?
Many people find store-bought fondant too sweet or bland. To improve flavor:
Add a few drops of vanilla, almond, or citrus extract while kneading.
Mix in melted white chocolate for a smoother, richer taste.
Opt for homemade fondant, which tends to be softer and more flavorful.
6. What’s the best way to color fondant?
Gel food coloring works best because it’s highly pigmented and doesn’t alter fondant texture. Here’s how to do it:
Use a toothpick to add color gradually, kneading until fully blended.
Wear gloves to avoid staining your hands.
For deep colors, let the fondant rest for a few hours—colors intensify over time.
7. How do I fix fondant that is too soft or too hard?
If fondant is too soft, knead in a bit of powdered sugar or tylose powder to firm it up.
If fondant is too hard, microwave it for 5-10 seconds to soften, then knead it until pliable.
8. Can I freeze leftover fondant?
Yes! To store fondant for later use:
Wrap it tightly in plastic wrap and place it in an airtight container.
When ready to use, let it come to room temperature before kneading to restore flexibility.
Final Thought
Mastering fondant cake decorating takes practice, but with these troubleshooting tips, you’ll be well on your way to creating flawless cakes. Have a question that wasn’t answered here? Drop it in the comments—we’re happy to help

