
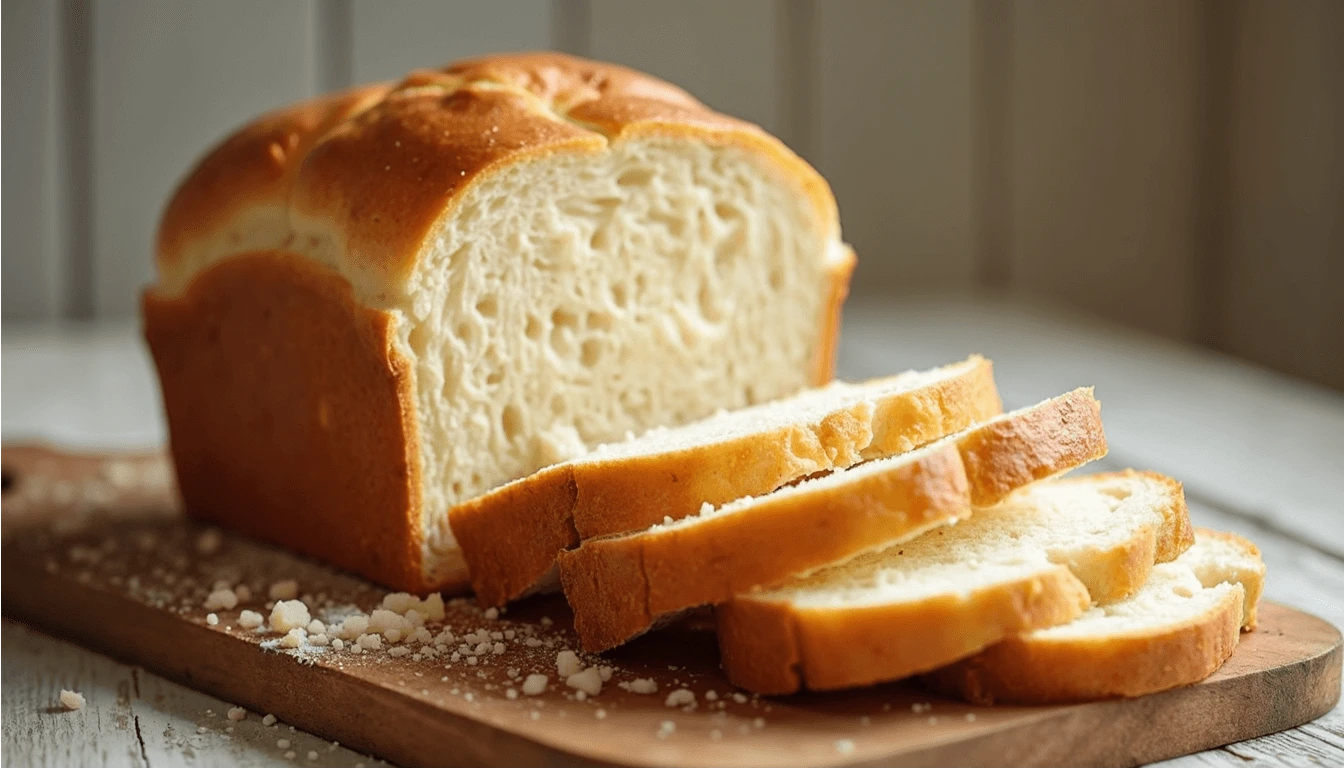
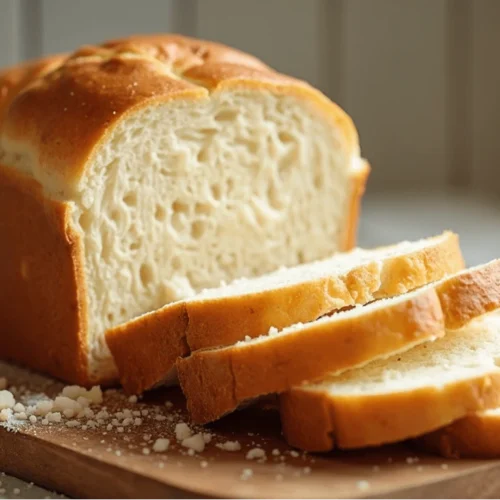
Have you ever dreamed of biting into a slice of gluten-free bread so delicious it feels like it’s straight from a bakery? Whether you’re navigating a gluten-free lifestyle or simply exploring healthier options, this best gluten-free bread recipe is here to amaze you. Imagine a loaf that’s soft, fluffy, and packed with flavor—perfect for sandwiches, toast, or even enjoying on its own.
What makes this recipe stand out? It’s not just about being gluten-free; it’s about creating a bread that everyone at your table will love, regardless of dietary needs. Plus, with simple ingredients like gluten-free flour blend, yeast, and a touch of honey, you’ll find it’s easier than you think to bake your own homemade masterpiece.
Ready to transform your kitchen into a gluten-free bakery? Let’s dive in and create a loaf that will have you saying, “I can’t believe it’s gluten-free
Table of Contents
Key Benefits
If you’ve ever struggled to find a gluten-free bread that actually tastes good, you’re not alone. Many store-bought options can be dry, crumbly, or just plain bland. But this best gluten-free bread recipe changes the game. Here’s why you’ll love it:
- Soft and Fluffy Texture: Say goodbye to dense, brick-like loaves. This bread is light, airy, and has the perfect crumb—just like traditional bread.
- Celiac-Friendly and Allergen-Free: Made with a gluten-free flour blend and free from common allergens, it’s safe for those with celiac disease or gluten intolerance.
- Nutritious and Wholesome: Packed with fiber and nutrients from whole grains, it’s a healthier choice for your daily meals.
- Versatile and Family-Approved: Whether you’re making sandwiches, toast, or serving it alongside soup, this bread is a crowd-pleaser that even non-gluten-free eaters will adore.
- Easy to Make: No fancy equipment or hard-to-find ingredients—just simple steps and a little patience for proofing.
Baking your own gluten-free bread isn’t just about meeting dietary needs; it’s about reclaiming the joy of fresh, homemade bread. Plus, the aroma of this loaf baking in your oven? Absolutely irresistible.
Ready to get started? Let’s gather your ingredients and dive into the magic of gluten-free baking
Gather Your Ingredients: Everything You Need for Perfect Gluten-Free Bread

Before we dive into baking, let’s gather everything you’ll need to create this best gluten-free bread. The beauty of this recipe lies in its simplicity—no hard-to-find ingredients or complicated steps. Here’s your checklist:
Dry Ingredients:
- 2 ½ cups gluten-free flour blend (look for one with xanthan gum for the best texture)
- 1 packet (2 ¼ tsp) active dry yeast (ensure it’s gluten-free)
- 1 tsp salt (enhances flavor and balances the sweetness)
- 1 tbsp sugar or honey (helps activate the yeast and adds a hint of sweetness)
Wet Ingredients:
- 1 ¼ cups warm water (about 110°F—perfect for activating the yeast)
- 2 tbsp olive oil or melted butter (adds moisture and richness)
- 1 tsp apple cider vinegar (helps with rise and texture)
Optional Add-Ins:
- 1-2 tbsp seeds (chia, flax, or sunflower for extra crunch and nutrition)
- 1 tsp herbs or spices (rosemary, garlic powder, or cinnamon for a flavor twist)
Pro Tips for Ingredient Success:
- Gluten-Free Flour Blend: Not all blends are created equal. I recommend using a high-quality blend like Bob’s Red Mill 1:1 or King Arthur Measure for Measure for consistent results.
- Yeast Activation: Make sure your water is warm but not hot—too hot, and it’ll kill the yeast; too cold, and it won’t activate properly.
- Customization: Feel free to experiment with add-ins like nuts, dried fruits, or even a sprinkle of cheese for a savory twist.
With these simple ingredients, you’re well on your way to creating a loaf of gluten-free bread that’s not only delicious but also tailored to your taste preferences. Ready to start mixing? Let’s move on to the instructions!
Step-by-Step Guide: How to Bake Perfect Gluten-Free Bread
Ready to bake the best gluten-free bread you’ve ever tasted? Let’s walk through the steps together—I’ll guide you like a friend in the kitchen, sharing tips and tricks to make this process smooth and enjoyable.
Step 1: Wake Up the Yeast
- In a small bowl, mix 1 ¼ cups warm water (around 110°F—think warm bath temperature) with 1 tbsp sugar or honey.
- Sprinkle 1 packet (2 ¼ tsp) of active dry yeast over the water and give it a gentle stir.
- Let it sit for 5-10 minutes until it becomes frothy and bubbly. This means your yeast is alive and ready to work!
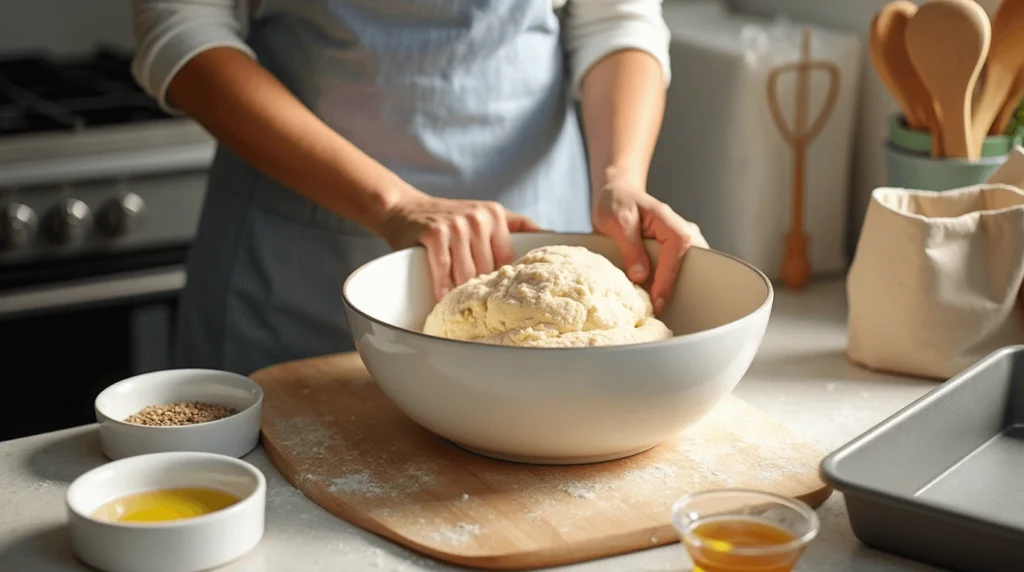
Step 2: Create the Dough
- In a large mixing bowl, whisk together 2 ½ cups gluten-free flour blend, 1 tsp salt, and any optional add-ins like seeds or herbs.
- Make a well in the center and pour in the yeast mixture, 2 tbsp olive oil (or melted butter), and 1 tsp apple cider vinegar.
- Stir everything together until a sticky dough forms. Don’t stress if it’s not smooth—gluten-free dough is naturally stickier than regular bread dough.
Step 3: Let the Dough Rise
- Cover the bowl with a clean kitchen towel or plastic wrap.
- Place it in a warm, cozy spot (like near a sunny window or on top of the oven) and let it rise for 45 minutes to 1 hour. You’ll know it’s ready when the dough has doubled in size.
Step 4: Shape Your Loaf
- Lightly grease a loaf pan or line it with parchment paper for easy removal.
- Transfer the dough to the pan and use wet hands to smooth the top. This helps prevent sticking and gives your loaf a nice finish.
Step 5: Second Rise
- Cover the loaf pan again and let the dough rise for another 30 minutes. This second rise ensures your bread will be light and airy.
Step 6: Bake to Golden Perfection
- While the dough rises, preheat your oven to 375°F (190°C).
- Once the dough is ready, place the loaf pan in the oven and bake for 35-40 minutes.
- Your bread is done when the top is a rich golden brown and sounds hollow when tapped lightly.
Step 7: Cool and Slice
- Take the bread out of the oven and let it cool in the pan for 10 minutes.
- Transfer it to a wire rack to cool completely before slicing. This resting time helps the bread set and makes it easier to cut into perfect slices.
Pro Tips for Success:
- Be Patient: Gluten-free bread needs time to rise and set properly. Rushing can lead to a dense loaf.
- Check the Temperature: For extra assurance, use a food thermometer to check the internal temperature—it should read around 200°F (93°C).
- Slice Gently: Use a serrated knife and a light sawing motion to avoid squishing the loaf.
And there you have it—your very own best gluten-free bread, made with love and care! Ready to explore some pro tips and variations? Let’s keep the baking fun going!
Pro Tips and Variations
Now that you’ve mastered the basics of this best gluten-free bread, let’s take it up a notch with some expert tips and creative variations. Whether you’re a seasoned baker or just starting out, these insights will help you customize the recipe to suit your taste and troubleshoot any challenges along the way.
Pro Tips for Perfect Gluten-Free Bread:
- Flour Matters: Not all gluten-free flour blends are created equal. Stick to trusted brands like Bob’s Red Mill or King Arthur for consistent results. If your blend doesn’t include xanthan gum, add 1 tsp to the dry ingredients for better texture.
- Hydration is Key: Gluten-free dough can be sticky, but resist the urge to add too much extra flour. A sticky dough often leads to a softer, fluffier loaf.
- Rise Time: Gluten-free bread may take longer to rise than traditional bread. If your kitchen is cool, place the dough in a slightly warmed oven (turned off) to speed up the process.
- Avoid Overmixing: Once the dough comes together, stop mixing. Overworking the dough can make the bread dense.
- Storage Tips: Store your bread in an airtight container or bag at room temperature for up to 3 days. For longer storage, slice and freeze it for up to 3 months.
Creative Variations to Try:
- Seeded Bread: Add a mix of chia seeds, flaxseeds, and sunflower seeds to the dough for extra crunch and nutrition.
- Herb-Infused Loaf: Stir in 1-2 tsp of dried herbs like rosemary, thyme, or oregano for a savory twist.
- Sweet Cinnamon Raisin: Mix in 1 tsp cinnamon and ½ cup raisins for a sweet, breakfast-ready loaf.
- Cheesy Garlic Bread: Add ½ cup shredded cheese and 1 tsp garlic powder for a savory, indulgent treat.
- Nutty Delight: Fold in ½ cup chopped nuts like walnuts or almonds for added texture and flavor.
Troubleshooting Common Issues:
- Dense Bread: This can happen if the dough doesn’t rise enough. Ensure your yeast is fresh and your water is at the right temperature for activation.
- Crumbly Texture: If your bread falls apart, try adding a bit more xanthan gum or psyllium husk to the dough for better binding.
- Cracked Top: A few cracks are normal, but if the top splits too much, the dough might be too dry. Add a splash of water next time.
With these tips and variations, you can make this best gluten-free bread recipe truly your own. Whether you stick to the classic version or experiment with new flavors, the possibilities are endless. Ready to serve it up? Let’s move on to some delicious serving suggestions
Serving Suggestions
Congratulations—you’ve baked a loaf of the best gluten-free bread! Now, let’s talk about how to enjoy it. This versatile bread is perfect for everything from quick breakfasts to hearty dinners. Here are some delicious ideas to inspire your meals:
Breakfast Ideas:
- Classic Avocado Toast: Slice and toast the bread, then top with mashed avocado, a sprinkle of salt, and a dash of chili flakes. Add a poached egg for extra protein.
- Sweet Toppings: Spread a layer of almond butter or peanut butter and drizzle with honey or a handful of fresh berries.
- French Toast: Dip slices in a mixture of eggs, milk (or a dairy-free alternative), and cinnamon, then pan-fry until golden. Serve with maple syrup and fresh fruit.
Lunch and Dinner Ideas:
- Sandwiches: Use this bread as the base for your favorite sandwiches. Try turkey and avocado, grilled veggies with hummus, or a classic BLT.
- Soup Companion: Pair a slice with a warm bowl of tomato soup, butternut squash soup, or chili for a comforting meal.
- Grilled Cheese: Make a gooey, melty grilled cheese sandwich using your favorite cheese (or a dairy-free alternative).
Snacks and Appetizers:
- Bruschetta: Toast slices and top with a mix of diced tomatoes, fresh basil, garlic, and a drizzle of olive oil.
- Charcuterie Board: Include slices of this bread alongside cheeses, cured meats, olives, and nuts for a crowd-pleasing appetizer.
- Dips and Spreads: Serve with spinach artichoke dip, guacamole, or roasted red pepper hummus.
Pro Tips for Serving:
- Slice Thickness: For sandwiches, slice the bread slightly thicker to hold up to fillings. For toast or appetizers, thinner slices work best.
- Reheating: If the bread has been stored, lightly toast it to bring back its fresh-baked texture and warmth.
- Pairing Flavors: Experiment with different spreads, toppings, and pairings to discover your favorite combinations.
This best gluten-free bread isn’t just a recipe—it’s a gateway to countless meals and memories. Whether you’re enjoying it solo or sharing it with loved ones, it’s sure to impress. Ready to wrap things up? Let’s head to the conclusion!
Conclusion
There you have it—your guide to baking the best gluten-free bread that’s soft, fluffy, and absolutely delicious! Whether you’re new to gluten-free baking or a seasoned pro, this recipe is designed to make the process simple, enjoyable, and rewarding.
Why This Recipe Works:
- Simple Ingredients: With just a handful of pantry staples, you can create a loaf that rivals any store-bought option.
- Customizable: From savory herbs to sweet add-ins, this recipe adapts to your taste preferences and dietary needs.
- Family-Friendly: Even those who don’t follow a gluten-free diet will love this bread, making it a versatile addition to your kitchen.
Final Thoughts:
Baking your own gluten-free bread is more than just a culinary project—it’s a way to take control of your diet, explore new flavors, and enjoy the satisfaction of creating something from scratch. Plus, the aroma of fresh bread filling your home is an unbeatable bonus!
So, whether you’re making this bread for yourself, your family, or a friend with dietary restrictions, know that you’re sharing more than just a loaf—you’re sharing love, care, and a little bit of magic.
Best Gluten Free Bread That Will Amaze You
Ingredients
Dry Ingredients:
- 2 ½ cups gluten-free flour blend look for one with xanthan gum for the best texture
- 1 packet 2 ¼ tsp active dry yeast (ensure it’s gluten-free)
- 1 tsp salt enhances flavor and balances the sweetness
- 1 tbsp sugar or honey helps activate the yeast and adds a hint of sweetness
Wet Ingredients:
- 1 ¼ cups warm water about 110°F—perfect for activating the yeast
- 2 tbsp olive oil or melted butter adds moisture and richness
- 1 tsp apple cider vinegar helps with rise and texture
Optional Add-Ins:
- 1-2 tbsp seeds chia, flax, or sunflower for extra crunch and nutrition
- 1 tsp herbs or spices rosemary, garlic powder, or cinnamon for a flavor twist
Pro Tips for Ingredient Success:
- Gluten-Free Flour Blend: Not all blends are created equal. I recommend using a high-quality blend like Bob’s Red Mill 1:1 or King Arthur Measure for Measure for consistent results.
- Yeast Activation: Make sure your water is warm but not hot—too hot and it’ll kill the yeast; too cold, and it won’t activate properly.
- Customization: Feel free to experiment with add-ins like nuts dried fruits, or even a sprinkle of cheese for a savory twist.
Instructions
Step 1:Wake Up the Yeast
- In a small bowl, mix 1 ¼ cups warm water (around 110°F—think warm bath temperature) with 1 tbsp sugar or honey.
- Sprinkle 1 packet (2 ¼ tsp) of active dry yeast over the water and give it a gentle stir.
- Let it sit for 5-10 minutes until it becomes frothy and bubbly. This means your yeast is alive and ready to work!
Step 2: Create the Dough
- In a large mixing bowl, whisk together 2 ½ cups gluten-free flour blend, 1 tsp salt, and any optional add-ins like seeds or herbs.
- Make a well in the center and pour in the yeast mixture, 2 tbsp olive oil (or melted butter), and 1 tsp apple cider vinegar.
- Stir everything together until a sticky dough forms. Don’t stress if it’s not smooth—gluten-free dough is naturally stickier than regular bread dough.
Step 3: Let the Dough Rise
- Cover the bowl with a clean kitchen towel or plastic wrap.
- Place it in a warm, cozy spot (like near a sunny window or on top of the oven) and let it rise for 45 minutes to 1 hour. You’ll know it’s ready when the dough has doubled in size.
Step 4: Shape Your Loaf
- Lightly grease a loaf pan or line it with parchment paper for easy removal.
- Transfer the dough to the pan and use wet hands to smooth the top. This helps prevent sticking and gives your loaf a nice finish.
Step 5: Second Rise
- Cover the loaf pan again and let the dough rise for another 30 minutes. This second rise ensures your bread will be light and airy.
Step 6: Bake to Golden Perfection
- While the dough rises, preheat your oven to 375°F (190°C).
- Once the dough is ready, place the loaf pan in the oven and bake for 35-40 minutes.
- Your bread is done when the top is a rich golden brown and sounds hollow when tapped lightly.
Step 7: Cool and Slice
- Take the bread out of the oven and let it cool in the pan for 10 minutes.
- Transfer it to a wire rack to cool completely before slicing. This resting time helps the bread set and makes it easier to cut into perfect slices.
Pro Tips for Success:
- Be Patient: Gluten-free bread needs time to rise and set properly. Rushing can lead to a dense loaf.
- Check the Temperature: For extra assurance, use a food thermometer to check the internal temperature—it should read around 200°F (93°C).
- Slice Gently: Use a serrated knife and a light sawing motion to avoid squishing the loaf.
Notes
- Calories: 150 kcal
- Fat: 4g
- Saturated Fat: 0.5g
- Carbohydrates: 25g
- Fiber: 3g
- Sugar: 2g
- Protein: 4g
- Sodium: 200mg
Got questions? Check out the FAQs below for quick answers, or dive back into the recipe and start baking. Happy baking, and enjoy every slice
FAQs
Got questions about making the best gluten-free bread? Don’t worry—I’ve got you covered! Here are answers to some of the most common questions to help you bake with confidence.
1. Can I use a different gluten-free flour blend?
Absolutely! While I recommend a 1:1 gluten-free flour blend (like Bob’s Red Mill or King Arthur), you can experiment with other blends. Just make sure they contain xanthan gum or add 1 tsp separately to ensure the bread holds together well.
2. Why is my bread dense or gummy?
This can happen if the dough doesn’t rise enough or if the flour blend absorbs too much moisture. To fix this:
Ensure your yeast is fresh and activated.
Measure your flour accurately (spoon it into the measuring cup and level it off).
Place the dough in a warm area, away from drafts, and let it rise until it doubles in size.
3. Can I make this bread without yeast?
Yes, but the texture will be different. For a yeast-free version, try using 1 ½ tsp baking powder and ½ tsp baking soda as leavening agents. Keep in mind that the bread will be denser and more like a quick bread.
4. How do I store gluten-free bread?
Room Temperature: Store in an airtight container or bag for up to 3 days.
Freezing: Slice the loaf, wrap it tightly in plastic wrap, and freeze for up to 3 months. Toast slices straight from the freezer for a fresh-baked taste.
5. Can I make this recipe vegan?
Definitely! Replace the honey with maple syrup or agave, and use a plant-based oil like olive or coconut oil instead of butter.
6. Why does my bread crack on top?
A few cracks are normal, but excessive cracking can happen if the dough is too dry. Next time, add a splash more water to the dough before baking.
7. Can I use a bread machine?
Yes! Add the ingredients to your bread machine in the order recommended by the manufacturer (usually wet ingredients first). Use the gluten-free setting if available, or select a basic cycle and monitor the dough’s consistency.
8. What’s the best way to slice gluten-free bread?
Let the bread cool completely before slicing.
Use a serrated knife and gentle sawing motions to avoid squishing the loaf.
For even slices, consider using a bread slicer guide.
9. Can I add eggs to this recipe?
Yes! Adding 1-2 eggs can make the bread richer and slightly more tender. If you do, reduce the water by ¼ cup to balance the moisture.
10. Is this bread celiac-friendly?
Yes, as long as all your ingredients are certified gluten-free and you avoid cross-contamination in your kitchen. Always check labels to ensure safety.
I hope these FAQs help you troubleshoot and perfect your best gluten-free bread! If you have more questions, feel free to reach out—I’m here to help. Happy baking!