Best Gluten Free Bread That Will Amaze You
Discover the best gluten-free bread recipe! Soft, fluffy, and easy to make—perfect for sandwiches, toast, and more. Bake your own today
Ingredients
Dry Ingredients:
- 2 ½ cups gluten-free flour blend look for one with xanthan gum for the best texture
- 1 packet 2 ¼ tsp active dry yeast (ensure it’s gluten-free)
- 1 tsp salt enhances flavor and balances the sweetness
- 1 tbsp sugar or honey helps activate the yeast and adds a hint of sweetness
Wet Ingredients:
- 1 ¼ cups warm water about 110°F—perfect for activating the yeast
- 2 tbsp olive oil or melted butter adds moisture and richness
- 1 tsp apple cider vinegar helps with rise and texture
Optional Add-Ins:
- 1-2 tbsp seeds chia, flax, or sunflower for extra crunch and nutrition
- 1 tsp herbs or spices rosemary, garlic powder, or cinnamon for a flavor twist
Pro Tips for Ingredient Success:
- Gluten-Free Flour Blend: Not all blends are created equal. I recommend using a high-quality blend like Bob’s Red Mill 1:1 or King Arthur Measure for Measure for consistent results.
- Yeast Activation: Make sure your water is warm but not hot—too hot and it’ll kill the yeast; too cold, and it won’t activate properly.
- Customization: Feel free to experiment with add-ins like nuts dried fruits, or even a sprinkle of cheese for a savory twist.
Instructions
Step 1:Wake Up the Yeast
- In a small bowl, mix 1 ¼ cups warm water (around 110°F—think warm bath temperature) with 1 tbsp sugar or honey.
- Sprinkle 1 packet (2 ¼ tsp) of active dry yeast over the water and give it a gentle stir.
- Let it sit for 5-10 minutes until it becomes frothy and bubbly. This means your yeast is alive and ready to work!
Step 2: Create the Dough
- In a large mixing bowl, whisk together 2 ½ cups gluten-free flour blend, 1 tsp salt, and any optional add-ins like seeds or herbs.
- Make a well in the center and pour in the yeast mixture, 2 tbsp olive oil (or melted butter), and 1 tsp apple cider vinegar.
- Stir everything together until a sticky dough forms. Don’t stress if it’s not smooth—gluten-free dough is naturally stickier than regular bread dough.
Step 3: Let the Dough Rise
- Cover the bowl with a clean kitchen towel or plastic wrap.
- Place it in a warm, cozy spot (like near a sunny window or on top of the oven) and let it rise for 45 minutes to 1 hour. You’ll know it’s ready when the dough has doubled in size.
Step 4: Shape Your Loaf
- Lightly grease a loaf pan or line it with parchment paper for easy removal.
- Transfer the dough to the pan and use wet hands to smooth the top. This helps prevent sticking and gives your loaf a nice finish.
Step 5: Second Rise
- Cover the loaf pan again and let the dough rise for another 30 minutes. This second rise ensures your bread will be light and airy.
Step 6: Bake to Golden Perfection
- While the dough rises, preheat your oven to 375°F (190°C).
- Once the dough is ready, place the loaf pan in the oven and bake for 35-40 minutes.
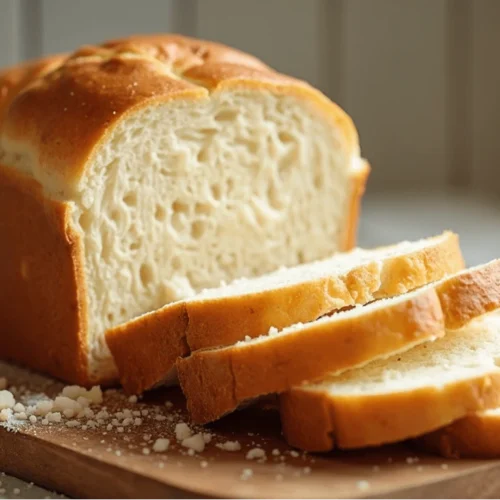
- Your bread is done when the top is a rich golden brown and sounds hollow when tapped lightly.
Step 7: Cool and Slice
- Take the bread out of the oven and let it cool in the pan for 10 minutes.
- Transfer it to a wire rack to cool completely before slicing. This resting time helps the bread set and makes it easier to cut into perfect slices.
Pro Tips for Success:
- Be Patient: Gluten-free bread needs time to rise and set properly. Rushing can lead to a dense loaf.
- Check the Temperature: For extra assurance, use a food thermometer to check the internal temperature—it should read around 200°F (93°C).
- Slice Gently: Use a serrated knife and a light sawing motion to avoid squishing the loaf.
Notes
Nutrition Information (per serving)
- Calories: 150 kcal
- Fat: 4g
- Saturated Fat: 0.5g
- Carbohydrates: 25g
- Fiber: 3g
- Sugar: 2g
- Protein: 4g
- Sodium: 200mg