

Are you ready to indulge in a dessert that combines luxury with simplicity? This Dubai Chocolate Bar recipe is the perfect treat for chocolate lovers who crave something rich, creamy, and utterly satisfying. Inspired by the decadent flavors of the Middle East, these chocolate bars are made with premium ingredients that elevate every bite. Whether you’re new to baking or an experienced chocolatier, this easy-to-make recipe offers endless possibilities. From adding crunchy nuts to infusing a hint of rose water, you can customize each bar to match your taste. Perfect for sharing, gifting, or enjoying all to yourself—this Dubai-inspired chocolate bar is sure to impress
Table of Contents
Key Benefits
Why should you make this Dubai Chocolate Bar recipe? Let me tell you! Not only does it satisfy your chocolate cravings, but it also brings a touch of luxury to any occasion. Here’s why this dessert is a must-try:
- Indulgent Flavors: The combination of rich, premium chocolate and smooth, creamy textures is an experience you won’t forget. Each bite is decadent, making it the perfect treat for those moments when you want something special.
- Easy-to-Make: While this recipe feels like a gourmet treat, it’s surprisingly simple to prepare. No need to be a professional chocolatier to pull off these delicious bars!
- Customizable: What makes this Dubai Chocolate Bar recipe so exciting is how easily you can make it your own. Whether you prefer a darker, richer chocolate base or want to experiment with different mix-ins like nuts, dried fruits, or even spices, the possibilities are endless. You can adjust the recipe to fit your personal taste or any occasion, ensuring every batch is uniquely yours!
- Perfect for Gifting: Looking for a thoughtful gift? These homemade chocolate bars are not only delicious but also present beautifully. Wrap them up, and you’ve got a luxury gift that anyone will appreciate.
- Satisfying and Shareable: Whether you’re enjoying them on your own or sharing with friends, these bars are sure to bring smiles to everyone. Serve them at dinner parties, gatherings, or as a special treat after a long day.
This recipe brings the best of both worlds—luxury and simplicity. And with the option to customize the ingredients, you can make it truly your own. So, let’s dive in and create these mouthwatering bars
Essential Ingredients for the Perfect Dubai Chocolate Bar
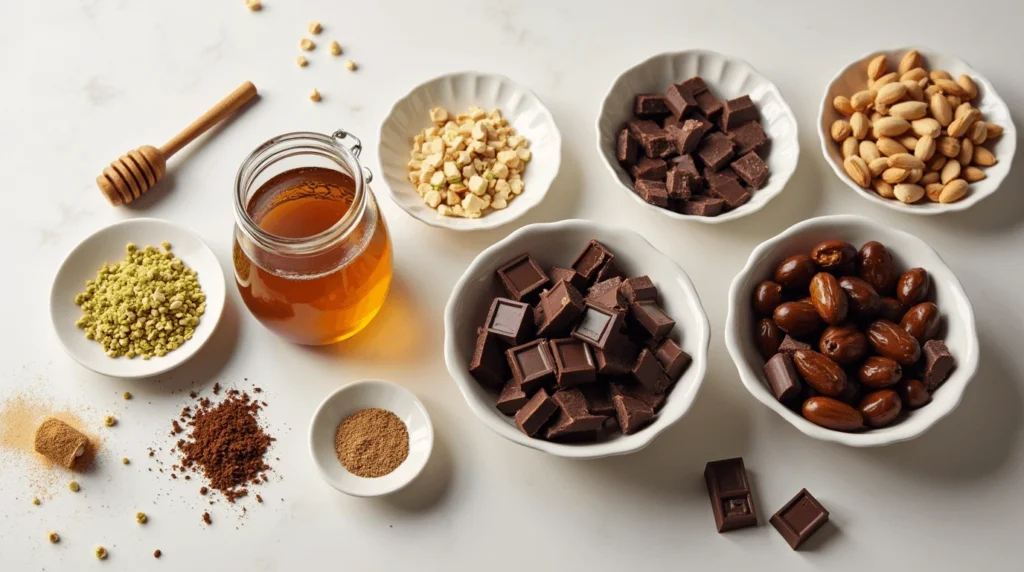
Before we dive into making these luxurious Dubai Chocolate Bars, let’s gather everything you’ll need. The key to making this recipe truly special is using the best quality ingredients you can find. Here’s what you’ll need to create these rich, indulgent bars:
Main Ingredients:
- Premium Chocolate (dark, milk, or white): Choose your favorite type of chocolate. Dark chocolate will give a rich, deep flavor, while milk chocolate offers a creamier, sweeter taste. White chocolate brings a smooth, mellow touch. You can mix and match for a unique flavor experience!
- Heavy Cream: This is the secret to the silky smooth texture that melts in your mouth. It helps the chocolate blend beautifully and creates that luxurious finish.
- Butter: A touch of butter adds richness and enhances the creamy texture of the chocolate.
- Vanilla Extract: A small splash of vanilla balances the chocolate’s sweetness and adds depth to the flavor.
Optional Add-ins for Extra Flavor:
- Chopped Nuts (almonds, hazelnuts, or pistachios): Adding crunchy nuts gives your chocolate bars an amazing texture and flavor contrast. Feel free to experiment with your favorite nuts or even mix them!
- Dried Fruits (raisins, cranberries, or apricots): If you’re a fan of sweet and savory combos, dried fruits are a perfect addition. They pair beautifully with the rich chocolate and add a chewy bite.
- Rose Water or Saffron: For a more authentic Dubai-inspired flavor, infuse the chocolate with a hint of rose water or saffron. These aromatic ingredients will elevate the bars with a delicate, floral note.
- Sea Salt: A sprinkle of sea salt on top gives your chocolate bars an irresistible balance between sweet and salty.
Equipment You’ll Need:
- Heatproof Bowl: For melting the chocolate and mixing in the ingredients.
- Molding Tray or Baking Sheet: To shape the bars. You can use a silicone mold for a neat, uniform shape or simply spread the mixture on a baking sheet and cut it into bars after it sets.
- Spatula: For stirring and spreading the chocolate mixture evenly.
Having these ingredients on hand will ensure that your Dubai Chocolate Bars come out rich, smooth, and absolutely indulgent. Plus, the customization options make it easy to tailor the recipe to your personal tastes. Now that we’ve got everything ready, let’s move on to the next step—melting and mixing!
Step-by-Step Guide to Making Dubai Chocolate Bars
Now that we have our ingredients ready, it’s time to bring everything together and create your luxurious Dubai Chocolate Bars. This step-by-step guide will walk you through each stage, making it easy and fun to prepare. Let’s get started!
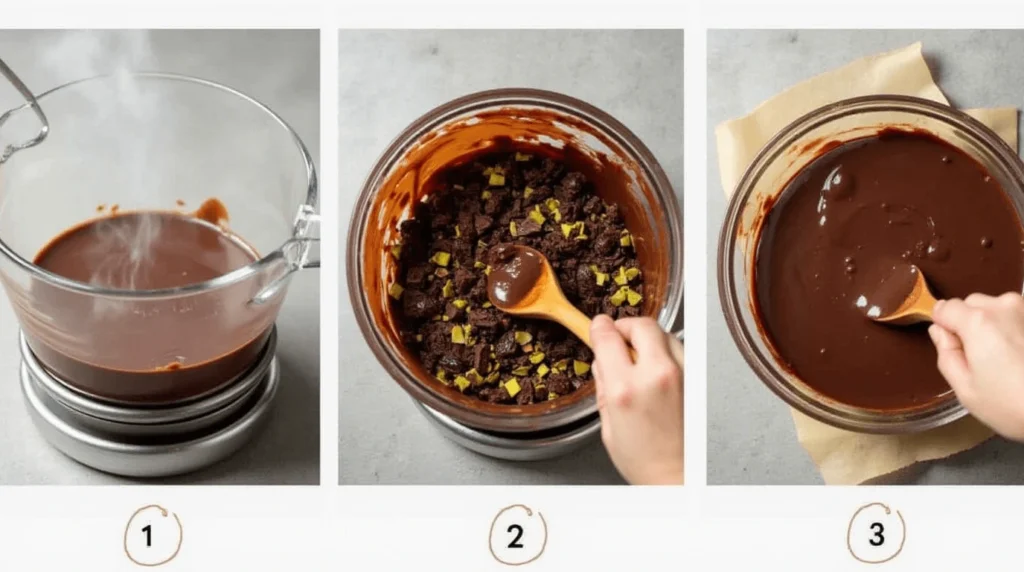
Step 1: Melt the Chocolate
- Chop the chocolate into small, even pieces. This ensures it melts smoothly and evenly.
- Melt the chocolate using the double boiler method. Simply place the chopped chocolate in a heatproof bowl over a pot of simmering water (make sure the bowl doesn’t touch the water). Stir gently until it’s completely melted and smooth.
- Alternatively, you can microwave the chocolate in short bursts (20-30 seconds), stirring in between, until fully melted.
Step 2: Add the Cream and Butter
- Once the chocolate is melted, remove it from the heat and add the heavy cream. Stir until fully incorporated—this will give the chocolate a creamy, luscious texture.
- Add butter to the mixture. Stir again until the butter is completely melted and blended into the chocolate, enhancing its richness.
Step 3: Mix in the Sugar (Optional)
- Taste your mixture. If you’re using dark chocolate and want a sweeter bar, add a little sugar to taste. Start with one tablespoon and adjust as needed. Stir well to dissolve the sugar into the melted chocolate mixture.
Step 4: Customize Your Chocolate Bar
- Add your mix-ins! This is where you can get creative. Stir in chopped nuts like almonds, pistachios, or hazelnuts for crunch. You can also add dried fruits such as raisins or chopped apricots for added sweetness and texture.
- For a unique twist, add a teaspoon of rose water or a few strands of saffron for that Middle Eastern flair. These flavors will give your bars a truly luxurious touch.
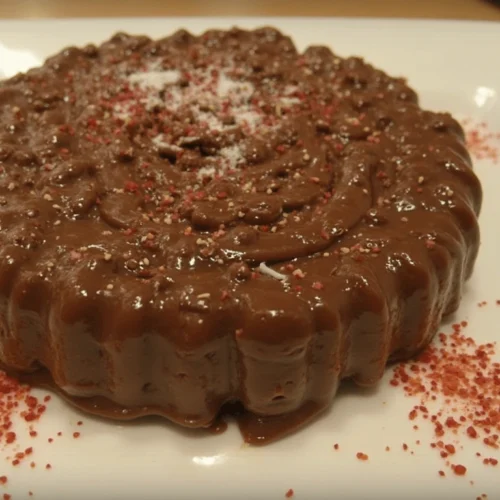
Step 5: Pour into Molds
- Once your mixture is smooth and well-blended, pour it into your molds. If you don’t have a chocolate bar mold, you can use a small baking pan lined with parchment paper. Gently tap the mold to release any air bubbles and ensure an even distribution.
Step 6: Chill and Set
- Place your filled mold in the fridge and allow it to chill for at least 2 hours or until the chocolate has fully set. This ensures that your bars hold their shape and have a firm, melt-in-your-mouth texture when you’re ready to enjoy them.
Pro Tip:
For an extra professional touch, you can sprinkle a pinch of sea salt or edible gold leaf on top of your chocolate bars before they set. This adds a beautiful finish and a touch of elegance!
Once your bars have set, they’re ready to be enjoyed or gifted. These Dubai-inspired chocolate bars are the perfect balance of richness, crunch, and unique flavors. Ready for the next step? Let’s move on to serving suggestions!
Pro Tips and Variations
Now that you’ve mastered the basic recipe, let’s explore some pro tips and variations to take your Dubai Chocolate Bars to the next level. Whether you’re looking to enhance flavor, customize textures, or add a special twist, these suggestions will make your chocolate bars even more memorable.
Pro Tips:
- Use High-Quality Chocolate: For the best results, always opt for premium chocolate. It will melt better, taste smoother, and elevate the overall flavor of your bars. Look for chocolate with a cocoa percentage that matches your taste—dark chocolate (70% or higher) for a more intense flavor or milk chocolate for a creamier, sweeter treat.
- Don’t Overheat the Chocolate: If you’re using a double boiler, make sure the water doesn’t touch the chocolate bowl. Overheating the chocolate can cause it to seize, which means it won’t melt smoothly. Stir gently to avoid any air bubbles and keep the texture silky.
- Chill Properly: The longer your chocolate bars chill, the firmer they’ll be. For the best texture, let them set in the fridge for at least 2 hours. If you’re in a hurry, the freezer works too—but I recommend 30 minutes to 1 hour for quicker chilling.
- Add Texture with Toppings: Don’t be afraid to add a little flair on top of your chocolate bars. A sprinkle of sea salt can bring out the chocolate’s sweetness, or you can get creative with crushed cookies, candied orange peel, or even chili flakes for a spicy kick.
Flavor Variations:
- Nutty Delight: Add more texture by stirring in your favorite nuts—from crunchy almonds to creamy cashews. The added crunch pairs perfectly with the smooth chocolate and enhances each bite.
- Fruit Infusion: If you’re a fan of fruity flavors, mix in dried fruit such as cranberries, apricots, or even dates for that Middle Eastern-inspired sweetness. It’s an unexpected but delicious contrast to the rich chocolate.
- Coffee Lovers: For an extra boost, try infusing your chocolate with a dash of espresso powder. It adds a subtle coffee flavor that pairs beautifully with dark chocolate, creating a more intense and sophisticated treat.
- Vegan-Friendly Version: If you’re looking for a dairy-free version, swap out the heavy cream and butter for coconut cream and coconut oil. You’ll get a creamy, rich texture with a hint of coconut flavor that complements the chocolate perfectly.
Special Touch:
- Rose Water: A few drops of rose water will give your chocolate bars a fragrant, floral note that’s both luxurious and unique. It’s a key ingredient in many Middle Eastern desserts, and it pairs beautifully with chocolate.
- Saffron Infusion: If you want to impress with something extra special, try adding a tiny pinch of saffron to your melted chocolate. The golden threads will add a beautiful color and a delicate, aromatic flavor that’s unmistakable.
By following these pro tips and variations, you’ll be able to craft the perfect Dubai Chocolate Bar for any occasion, whether it’s a cozy treat for yourself or a stunning gift for loved ones. Get creative, and don’t hesitate to experiment with different textures and flavors—this recipe is all about making it your own!
Serving Suggestions
Now that your Dubai Chocolate Bars are perfectly set and ready to be devoured, it’s time to think about how to serve them! Whether you’re treating yourself, hosting a gathering, or gifting these bars to someone special, here are some creative and mouthwatering ways to serve your delicious chocolate creation.
1. As a Dessert Platter
- Arrange your chocolate bars on a beautiful dessert platter alongside other sweets like cookies, macarons, or mini tarts. This makes for an elegant and indulgent dessert table, perfect for a dinner party or celebration.
- Add a touch of greenery by garnishing with fresh mint leaves or a sprinkle of edible gold dust for that extra bit of luxury.
2. Gift-Giving
- Pack your Dubai Chocolate Bars in beautiful gift boxes or wrap them individually in parchment paper and twine for a personal touch. These make stunning homemade gifts for friends and family, especially for holidays or special occasions like birthdays, anniversaries, or Ramadan.
- For an added flair, consider pairing the bars with a small bottle of rose water or saffron to share the magic behind the flavors.
3. With a Cup of Tea or Coffee
- These chocolate bars are a perfect companion to a warm beverage. Serve them with a cup of morning coffee, afternoon tea, or even a rich hot chocolate for an indulgent experience.
- Try pairing with green tea for a lighter, more refreshing option, or enjoy with a spicy chai latte for a delightful contrast of flavors.
4. As an Ice Cream Topping
- Break the chocolate bars into smaller pieces and use them as a topping for your favorite ice cream. Whether you’re enjoying vanilla, chocolate, or even something fruity, the rich, creamy chocolate bars will add an extra layer of flavor and texture.
- You can also melt down the chocolate bars and drizzle the melted chocolate over the ice cream for a decadent chocolate sauce.
5. Chocolate Bar S’mores
- Create a twist on the classic s’mores by substituting the regular chocolate with pieces of your homemade Dubai Chocolate Bars. Whether you’re grilling or making them in the oven, these chocolate bars will melt beautifully between toasted marshmallows and graham crackers for an unforgettable treat.
6. Pair with Fresh Fruit
- Fresh fruits such as strawberries, banana slices, or sliced pears pair wonderfully with the rich and creamy chocolate. You can either dip the fruit into the chocolate bar chunks or serve them on the side as a refreshing contrast.
- For a special touch, try adding a drizzle of honey or almond butter over the fruit for a sweet, nutty flavor combo.
By following these serving suggestions, you can elevate the experience of enjoying your Dubai Chocolate Bars in countless ways. Whether you’re sharing them with loved ones or indulging solo, these creative ideas will make every bite even more delightful. Enjoy the process, and remember—there’s no wrong way to savor these chocolate bars!
Conclusion
Congratulations! You’ve just created the most delicious and irresistible Dubai Chocolate Bars, ready to impress everyone who gets a taste. Whether it’s your first time making chocolate bars or you’re a seasoned pro, this recipe is sure to become a favorite in your kitchen. With its perfect balance of rich chocolate and customizable flavors, you can tweak it to suit your taste or share it as a thoughtful gift.
The beauty of this recipe lies in its simplicity—yet, it offers endless possibilities for creative variations and serving ideas. From adding your favorite toppings to pairing them with a hot beverage, the options are as endless as your imagination.
Remember, cooking is all about enjoying the process and sharing the results with those you care about. These Dubai Chocolate Bars aren’t just a treat for your taste buds—they’re a way to make special moments even sweeter.
Whether you’re making them for a holiday, a special occasion, or just a little indulgence, this recipe is sure to be a hit. So go ahead, enjoy your creation, and share the joy with those around you. And next time you make them, don’t forget to experiment with new flavors and toppings—you’ll be amazed at the delicious combinations you can come up with!
Happy cooking, and here’s to more delicious adventures in your kitchen
dubai chocolate bar recipe
Ingredients
Main Ingredients:
- Premium Chocolate dark, milk, or white: Choose your favorite type of chocolate. Dark chocolate will give a rich, deep flavor, while milk chocolate offers a creamier, sweeter taste. White chocolate brings a smooth, mellow touch. You can mix and match for a unique flavor experience!
- Heavy Cream: This is the secret to the silky smooth texture that melts in your mouth. It helps the chocolate blend beautifully and creates that luxurious finish.
- Butter: A touch of butter adds richness and enhances the creamy texture of the chocolate.
- Vanilla Extract: A small splash of vanilla balances the chocolate’s sweetness and adds depth to the flavor.
Optional Add-ins for Extra Flavor:
- Chopped Nuts almonds, hazelnuts, or pistachios: Adding crunchy nuts gives your chocolate bars an amazing texture and flavor contrast. Feel free to experiment with your favorite nuts or even mix them!
- Dried Fruits raisins, cranberries, or apricots: If you’re a fan of sweet and savory combos, dried fruits are a perfect addition. They pair beautifully with the rich chocolate and add a chewy bite.
- Rose Water or Saffron: For a more authentic Dubai-inspired flavor infuse the chocolate with a hint of rose water or saffron. These aromatic ingredients will elevate the bars with a delicate, floral note.
- Sea Salt: A sprinkle of sea salt on top gives your chocolate bars an irresistible balance between sweet and salty.
Equipment You’ll Need:
- Heatproof Bowl: For melting the chocolate and mixing in the ingredients.
- Molding Tray or Baking Sheet: To shape the bars. You can use a silicone mold for a neat uniform shape or simply spread the mixture on a baking sheet and cut it into bars after it sets.
- Spatula: For stirring and spreading the chocolate mixture evenly.
Instructions
Step 1: Melt the Chocolate
- Chop the chocolate into small, even pieces. This ensures it melts smoothly and evenly.
- Melt the chocolate using the double boiler method. Simply place the chopped chocolate in a heatproof bowl over a pot of simmering water (make sure the bowl doesn’t touch the water). Stir gently until it’s completely melted and smooth.
- Alternatively, you can microwave the chocolate in short bursts (20-30 seconds), stirring in between, until fully melted.
Step 2: Add the Cream and Butter
- Once the chocolate is melted, remove it from the heat and add the heavy cream. Stir until fully incorporated—this will give the chocolate a creamy, luscious texture.
- Add butter to the mixture. Stir again until the butter is completely melted and blended into the chocolate, enhancing its richness.
Step 3: Mix in the Sugar (Optional)
- Taste your mixture. If you’re using dark chocolate and want a sweeter bar, add a little sugar to taste. Start with one tablespoon and adjust as needed. Stir well to dissolve the sugar into the melted chocolate mixture.
Step 4: Customize Your Chocolate Bar
- Add your mix-ins! This is where you can get creative. Stir in chopped nuts like almonds, pistachios, or hazelnuts for crunch. You can also add dried fruits such as raisins or chopped apricots for added sweetness and texture.
- For a unique twist, add a teaspoon of rose water or a few strands of saffron for that Middle Eastern flair. These flavors will give your bars a truly luxurious touch.
Step 5: Pour into Molds
- Once your mixture is smooth and well-blended, pour it into your molds. If you don’t have a chocolate bar mold, you can use a small baking pan lined with parchment paper. Gently tap the mold to release any air bubbles and ensure an even distribution.
Step 6: Chill and Set
- Place your filled mold in the fridge and allow it to chill for at least 2 hours or until the chocolate has fully set. This ensures that your bars hold their shape and have a firm, melt-in-your-mouth texture when you’re ready to enjoy them.
Pro Tip:
- For an extra professional touch, you can sprinkle a pinch of sea salt or edible gold leaf on top of your chocolate bars before they set. This adds a beautiful finish and a touch of elegance!
Notes
- Calories: 180 kcal
- Fat: 12g
- Saturated Fat: 7g
- Cholesterol: 20mg
- Sodium: 15mg
- Carbohydrates: 18g
- Fiber: 2g
- Sugars: 14g
- Protein: 3g
FAQs
It’s totally normal to have some questions when trying out a new recipe, especially one as delicious as these Dubai Chocolate Bars! To help you along the way, here are some frequently asked questions to ensure your baking experience goes smoothly.
1. Can I use white chocolate instead of dark chocolate?
Absolutely! While dark chocolate gives a rich, intense flavor, you can swap it for white chocolate for a sweeter, creamier result. Keep in mind that white chocolate will melt more easily and be a bit softer once set, but it still works beautifully in this recipe.
2. How do I store leftover chocolate bars?
To keep your chocolate bars fresh, store them in an airtight container in a cool, dry place. If you live in a warm climate, it’s best to keep them in the fridge to prevent them from melting, but allow them to come to room temperature before serving for the best texture and flavor.
3. Can I make this recipe vegan?
Yes! You can easily make these chocolate bars vegan by swapping out the butter and cream for plant-based alternatives like coconut oil and coconut cream. Make sure the chocolate you choose is also dairy-free (many dark chocolates are, but always double-check the label).
4. What’s the best way to melt chocolate without burning it?
The key to melting chocolate perfectly is to use gentle heat. The double boiler method (placing a heatproof bowl over simmering water) works wonders, but if you’re in a rush, you can melt chocolate in the microwave in short bursts of 15-20 seconds, stirring between each. Just be sure to go slowly and never let it overheat.
5. Can I add more toppings to the chocolate bars?
Definitely! This recipe offers plenty of room for creativity,. Try adding crushed nuts, dried fruit, or even a sprinkle of sea salt for an extra touch. Just make sure the toppings are evenly distributed to maintain a perfect bite every time.
6. How long do these chocolate bars last?
If stored correctly in an airtight container, your Dubai Chocolate Bars should last up to two weeks.For longer storage, try freezing your chocolate bars. This helps preserve their freshness while making them easy to grab whenever you need a sweet treat!
7. Can I use different flavored chocolate for variety?
Of course! Feel free to experiment with different types of chocolate, like hazelnut or mint-flavored varieties, to create your own unique twist. The base recipe is flexible, so get creative with flavors that match your taste.
8. What can I pair these chocolate bars with for a perfect dessert?
These chocolate bars pair wonderfully with a cup of coffee, tea, or a glass of dessert wine. For a more indulgent treat, serve them alongside a scoop of vanilla ice cream or drizzle with caramel sauce for extra decadence.
If you have any questions or ideas, don’t hesitate to reach out. I’m always happy to help! Happy baking
3 thoughts on “Dubai Chocolate Bar Recipe You’ll Instantly Love”
Comments are closed.